Spreadsheet Upload Tool Instructions
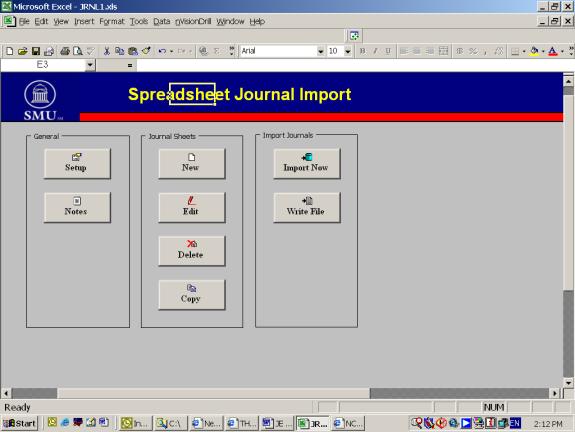
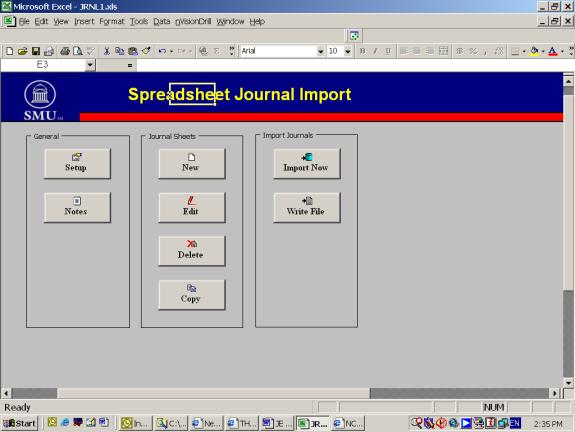
1. Launch JRNL1.xls file. This screen appears:

2. To create a new journal sheet from scratch, click "New." To copy an existing journal sheet, click "Copy."
Clicking "New" results in this screen:
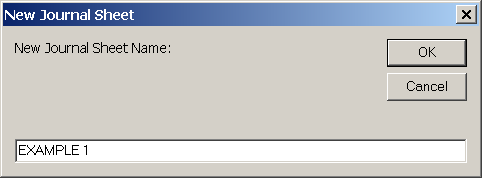
3. Enter a name for the new journal sheet. In this instance EXAMPLE 1 is the journal sheet name.
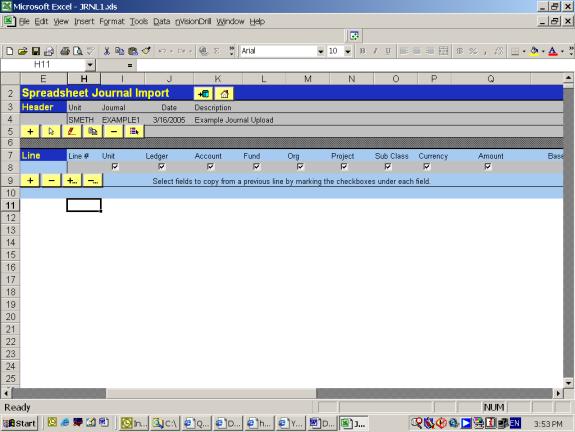
Click OK. This screen appears:
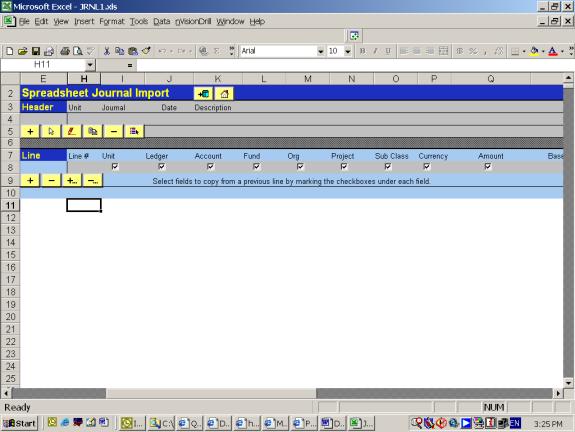
4. Notice there are separate Header and Line sections. This gray border segregates the sections.
Begin by entering Header information for the journal. Click the yellow "+" button to add a Header.
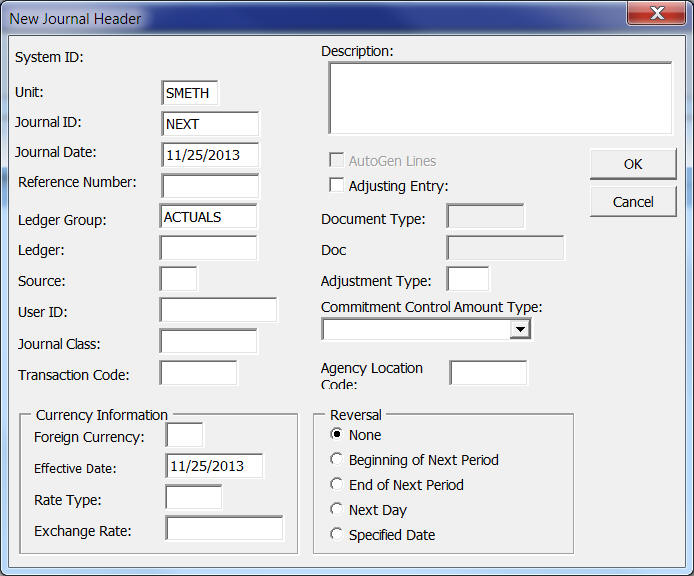
5. Enter data into these fields and click OK.
- Journal ID = NEXT
- Journal Date
- Source (may default)
- User ID (may default)
- Description (optional)
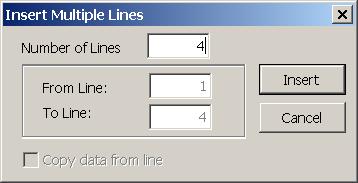
6. The information you entered now appears in the Header section. Next, move t the Lines section to enter journal lines. Begin by counting the number of lines your complete journal should have. Then press the yellow "+...." button. The Insert Multiple Lines box appears. Enter the total number of lines in your journal and click Insert."
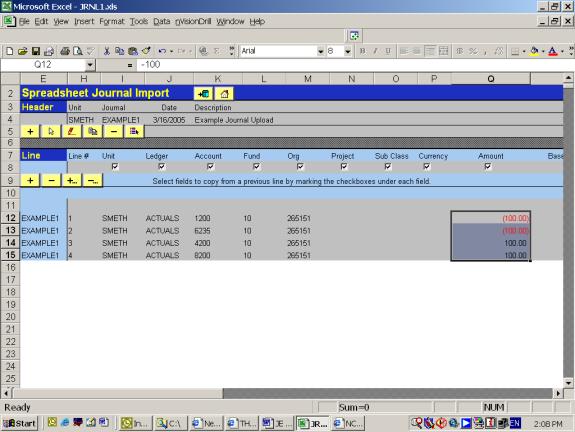
7. In this example we are entering a 4-line journal. You will see four lines created in the Lines section:
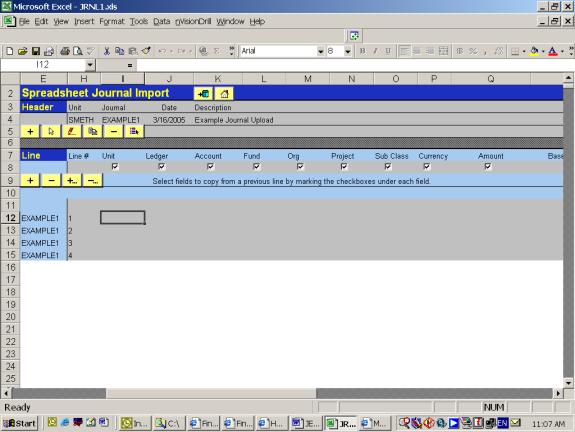
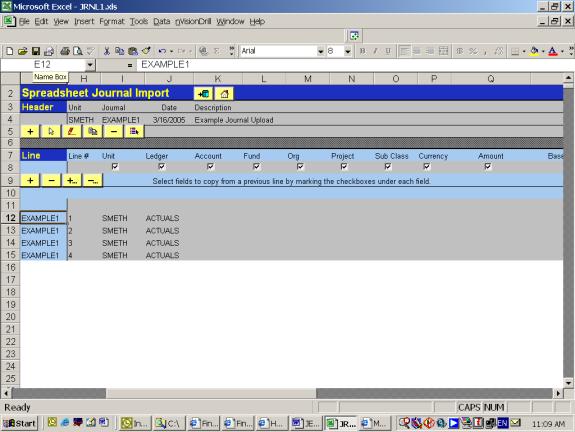
8. In the "Unit" column, enter and copy/paste "SMETH" to all lines.
9.In the "Ledger" column, enter and copy/paste "ACTUALS" to all lines.
10. For each line, these fields can be populated:
- Account (required)
- Fund (required)
- Org (required)
- Project (optional)
- Sub-class (optional)
- Amount (required)
- Reference (optional)
- Description (optional)
Tips for Populating Data in Sheet:
- For efficiency, avoid manual data entry when possible. Copy data from other electronic sources (such as spreadsheets) and paste into this journal sheet.
- When copying data from other spreadsheets, use Paste Special -> Values command instead of regular Paste command. This copies/pastes only values and prevents formulas from being pasted into your journal sheet.
- Copy/Paste entire columns at a time if possible (for example, all Accounts and then all Orgs, etc.)
- Do not use special characters such as slash (/), hypen (-), colon (:), number (#), etc. in the Description field. The system cannot recognize these and will give you an error message when importing the file.
- When you think you are done, verify the Amount field sums to zero (highlight all Amount cells.)
11. Save your work and then click the yellow house icon at the top to return to the Home screen. Click the "Write File" button.
12. Select the journal sheet you wish to create a file to upload. Make sure the sheet you select is highlighted in blue.

13. For File Name enter the following ...C:\JE Upload\(filename).xml . . . where (filename) represents the file name you assign the upload file to be created. We recommend you give it the same name as your Journal Sheet name, but that is not a requirement.
In this example, we've named the file EXAMPLE1 (see below)
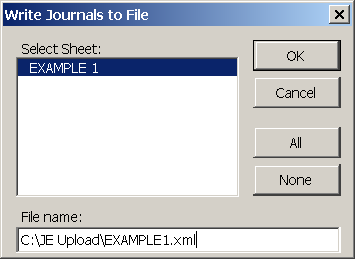
14. Click OK when you are finished assigning the File Name. The box will disappear.
15. Verify your file was created in the C:\JE Upload folder.
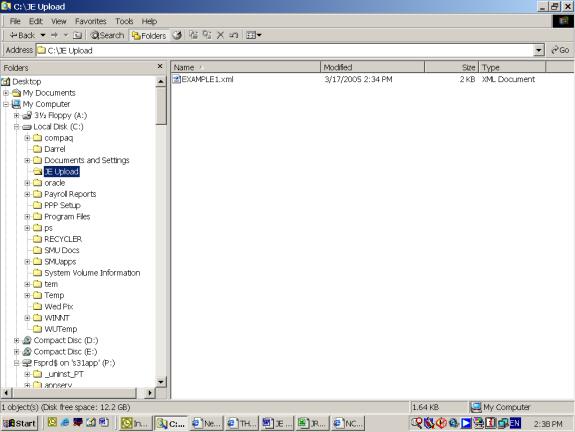
IF A DEPOSIT JOURNAL: Copy the file to your area's specified directory on the T drive and notify Joy Smith. Congratulations, you are finished!
IF NOT A DEPOSIT JOURNAL: You still need to upload your file into SMU Financials. Continue with the steps below.
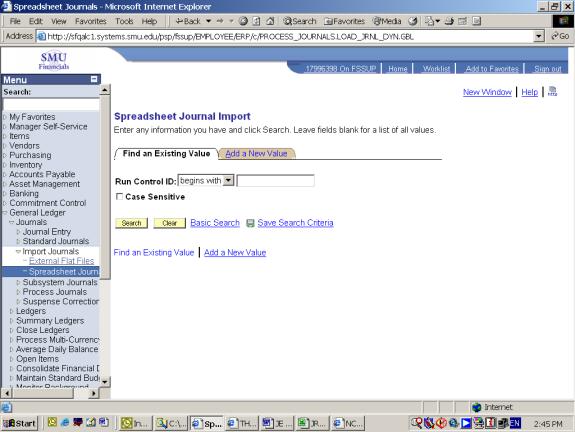
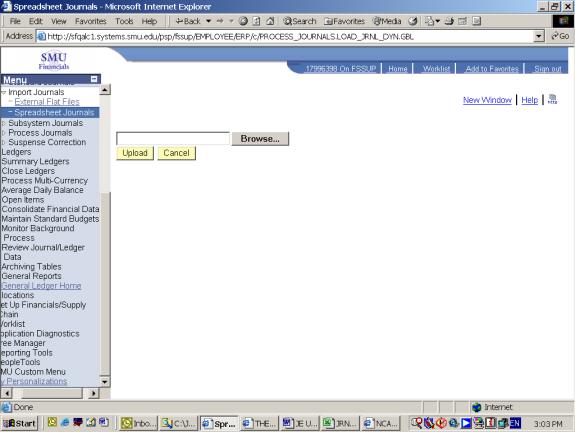
16. Logon to SMU Financials and navigate to General Ledger - Journals - Import Journal - Spreadsheet Journals.
FIRST-TIME SETUP STEPS: The first time you upload a journal, perform these steps. Otherwise, skip to step 19 below.
17. Click "Add a new value" tab. Enter "JEUPLOAD" for run control ID.
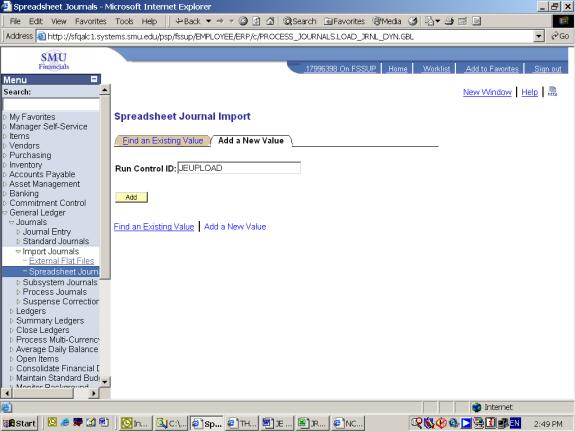
18. Click the Add button. When the screen below appears, click Save.
19. Click "search" and the screen above should appear. If the "Attached File" field is populated, click on the Trash Can icon to clear the field. If "Attached File" filed is not populated, go to step 20.
20. Click on the Paper Clip icon. The following screen appears:
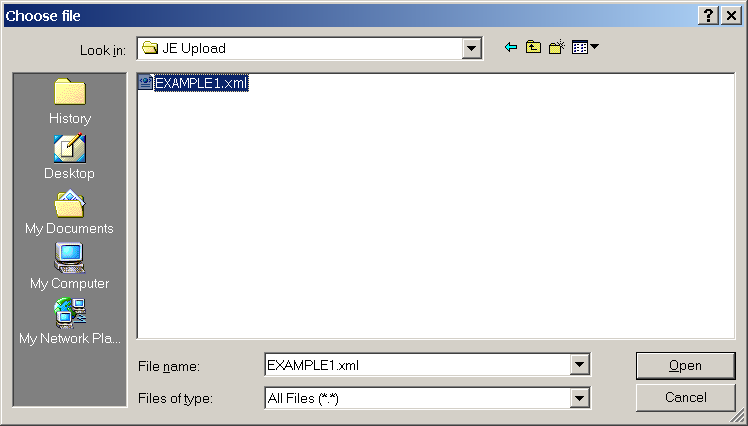
21. Click "Browse" and the Choose File box appears. Select your upload file and click "Open."
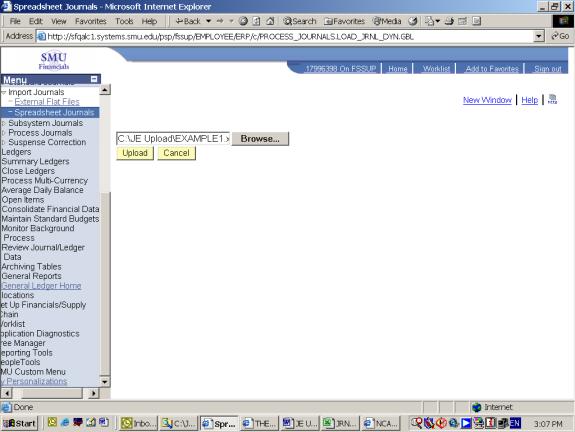
22. The path to the file now appears. Click "Upload" button.
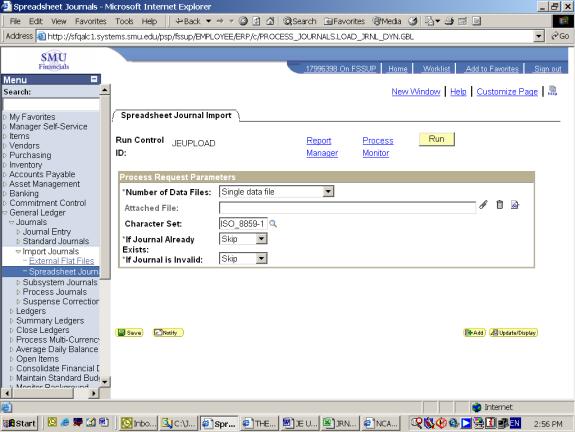
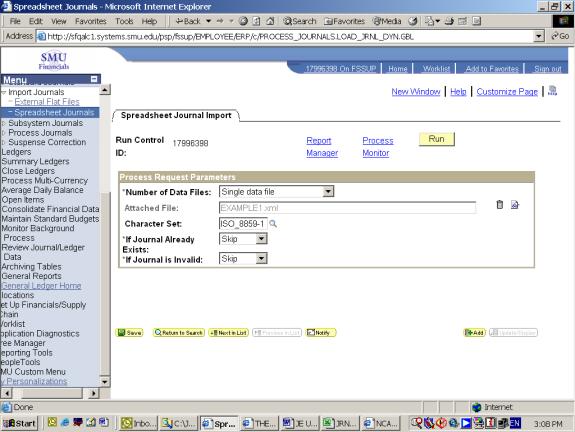
23. The following screen re-appears, except the path to the upload file is now listed. Click the "Run" button.
24. The following page appears. Click the "OK" button.
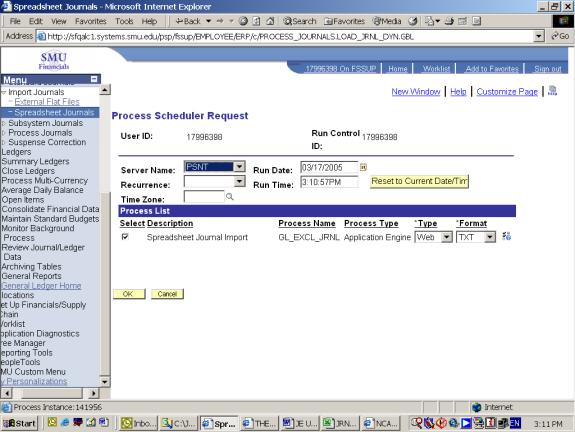
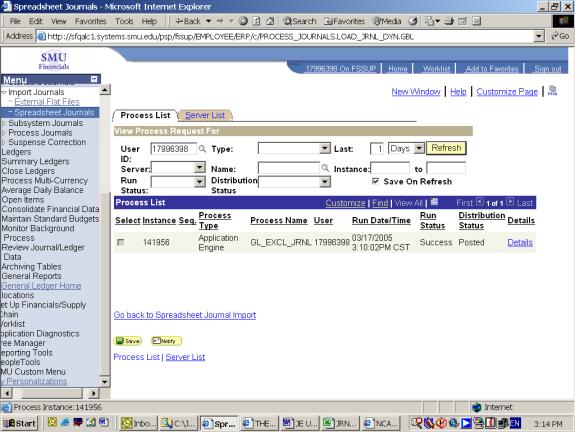
25. The following page re-appears. Note the addition of Process Instance number. This means the process is running. Click on Process Monitor link.

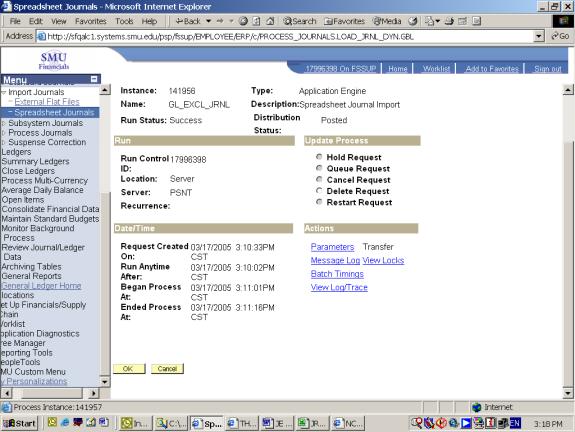
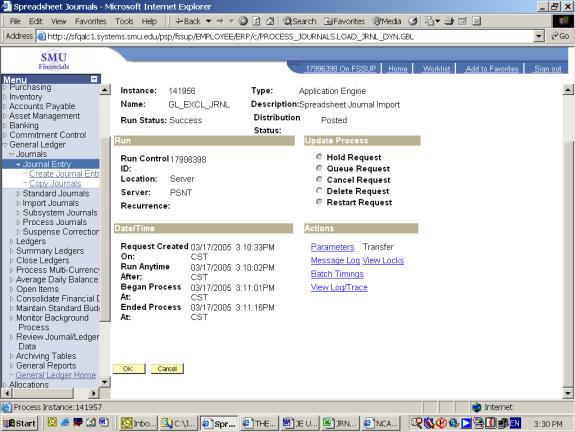
26. The following page appears. Click the yellow "Refresh" button until Run Status equals "Success." When it does, click on the Details link.
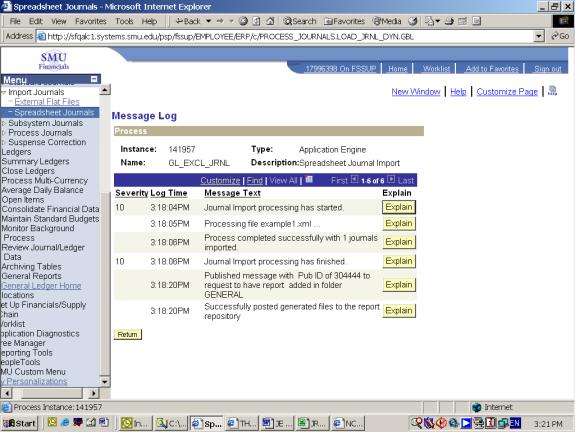
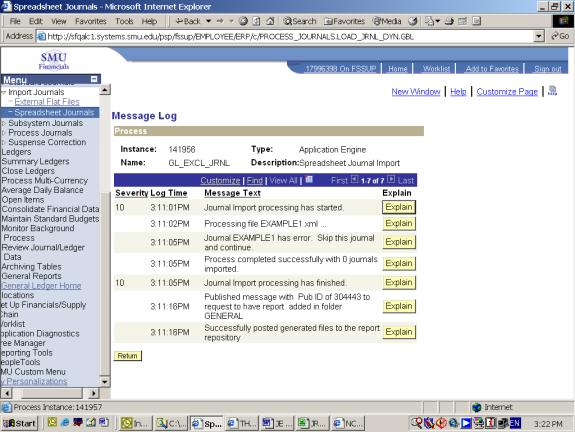
27. From this screen click on the Message Log link.
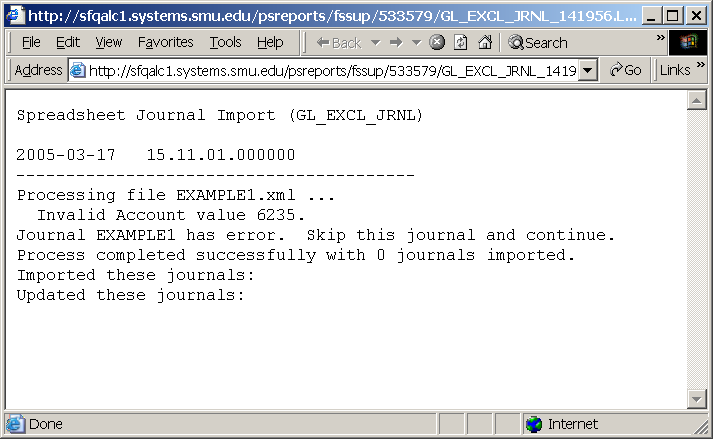
28. Review the message log. It will tell you whether the file was successfully imported or not. The following two screens display different results - the first was a successful import, the second was not. The key is if the number of journals imported equals 0 (failure) or 1 (success.)
IF IMPORT IS SUCCESSFUL:
You are almost finished. Open up the just-imported journal at General Ledger - Journals - Journal Entry - Create Journal Entry and run the Edit process to give it a V (valid) status. If there are errors, correct them and re-run the Edit process.
Congratulations, you are now finished!
IF IMPORT FAILED:
Your file has an error in it that needs to be corrected. To determine the error, follow the steps below.
29. Click "Return" to return to the following screen. Click on View Log/Trace link.
30. The following screen appears. Click on the Message Log link.

31. A separate browser window launches with a reason for the failed import. In this example, it was because an invalid Account number was used. To correct these errors, you must return to the JE Upload Tool (step 10 above), correct the data in error and then recreate the file for upload. In other words, repeat the process beginning at Step 10.